
I have been working more and more with Linux lately. The job as a Program Manager has put some of my skills to the test. Oddly, I actually taught a semester of Linux back in my “college professor days.” And despite the kicking and screaming, funny enough, I am close to becoming a novice beginner at it.
Last year, I took the deep dive, spending nearly 100% of my personal time in Linux – command line and UI wise. I had an Ubuntu VM in the cloud that I worked with and repurposed on one of my old laptops with a distro of Elementary OS (essentially a MacOS like shell on top of Ubuntu).
Well, recently, I have been playing about with the Windows Subsystem for Linux. In the early days this was what I called a novelty. You could open a command prompt and start bashing out Linux commands and feeling totally geeky 🤓. However, recently, I found that you can now run Linux Applications in a window from Windows 11. This was a bit of a game changer, as now I can run Linux and Windows (side-by-side).
So, I just got through developing and testing an Office JS add-in (which I just published to the store) from Linux using VS Code and Microsoft Edge. It will hopefully be released soon, and I will blog it here (Send to Trello for Outlook Add-in).
Here is how I did it:
- First, I would suggest installing Windows Terminal. I can spend a whole blog post on this and might, but it allows you to run CMD, PowerShell and BASH all side by side in tabs. It is awesome.
- Open Terminal and install WSL. From a PowerShell tab type “wsl –install”. By default, this will put Ubuntu 20 (behind the scenes) on your system.
- Once installed and you restart the Windows Terminal App, you should see Ubuntu as an option for opening a new Tab.
- Select that. If it is your first time, you will need to supply it with a username and password.
- Once setup, you simply need to start installing apps:
- Type: “sudo apt update” to start updating the apps, this is like “Windows Update” for Linux.
- Next, type: “sudo apt install x11-apps -y” to get the basic software installed.
- Next, you will want to install Microsoft Edge:
- To install Edge use the code from this page: https://www.microsoftedgeinsider.com/en-us/download?platform=linux-deb (scroll down past the ‘download’ links).
- Before you run it, you will want to type: “sudo su” and sign in. This signs you in as SUPER USER so that you can do things as an administrator.
- After it is installed type “exit” to return to normal user mode.
- Finally, install VS Code, like this: in the Terminal Window, type: “microsoft-edge” which will open Edge. From there go to Bing, search for “install VSCode on Linux” and it should not be too difficult to follow the steps you find. But to help out a bit… 😊 Follow the steps for Ubuntu, here: https://code.visualstudio.com/docs/setup/linux.
- Now you can type “code” in the Linux command prompt and VSCode for Linux will open in a separate window. From there you can build your application and test it in Edge for Linux as well. That is what I did.

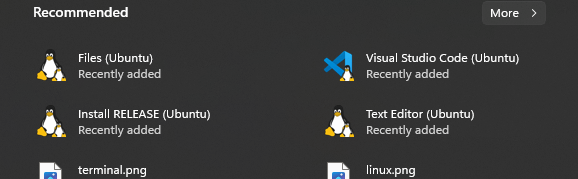
The coup-de-grace, it places these applications right on your START menu:
So, a friend asked me…”Uh, so.. like.. why?” I answered, “Uh… Because, I can!” 🤓
It has been a fun journey, learning something new and as it turns out, it has come in handy quite a few times in the new role as different aspects of the system we are developing cross paths with Linux. I also have a sneaky suspicion that this Windows/Linux integration lines are going to get a bit more “blurred” in the coming years (100% personal opinion).


